
Tack-It Method Fall Glitter Tumbler
We’re big fans of fall here at Aleene’s. One of the reasons being because it’s full of pumpkin spice and everything nice! So of course we’re all about this fabulous fall glitter tumbler from the Craft Box Girls, made using the Tack-It Method with Aleene’s Tack-It Over & Over. Not familiar with this easy process? We’ve got you covered in this tutorial! You’ll be set to make your own glitter tumbler you can fill with all of the pumpkin spiced lattes your heart desires this season. Cheers!
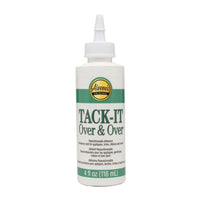
What you need:- Aleene’s Tack-It Over & Over
- Tumbler
- Fine glitter in desired fall colors
- Spray paint/primer in desired color
- Tumbler spinner
- Epoxy
- Craft sticks
- Plastic cups
- Gloves
- Fine-bristle paintbrush
- Mask (when working with epoxy)
- Adhesive vinyl decal of desired phrase/design
- Masking tape
Step 1:

Choose your desired design/lettering in a fun fall color, then pick coordinating glitter colors to go with it! Craft Box Girls used red, gold and brown, but feel free to mix things up for your own project.
Step 2:
Before getting started, make sure your tumbler is clean and free from dust and prints before spray painting. Tape the inside to protect from spray paint. Working in a well-ventilated area, spray paint your tumbler then let it dry completely.
Step 3:
Mix a 1:1 ratio of Tack-It Over & Over and water in a plastic cup.
Step 4:
Place the tumbler on a tumbler spinner and brush a coat of the Tack-It/water mixture onto the tumbler. Let it dry so it forms a tacky texture.
Step 5:
Turn the tumbler spinner on and sprinkle glitter evenly over the tumbler. You can choose one color or do an ombre effect with multiple colors like Craft Box Girls.
Step 6:
Use your fingers to press and smooth the glitter into the tacky surface on the tumbler. This is the magic of the Tack-It Method!
Step 7:
Mix your epoxy according to instructions, wearing a mask and gloves for extra caution. Once your epoxy is ready, turn on your tumbler spinner so it spins slowly, then pour and spread the epoxy over the tumbler. You can use your gloved fingers to help smooth the epoxy, covering the entire tumbler and the bottom of the tumbler. Let the tumbler spin for 8 to 12 hours while the epoxy cures.
Step 8:
Once the epoxy has cured, apply the vinyl decal, then apply one final coat of epoxy. Let the tumbler spin until the epoxy has completely cured.
Step 9:
And now your fabulous fall glitter tumbler is ready to keep your pumpkin spiced lattes yummy while you tackle your day!