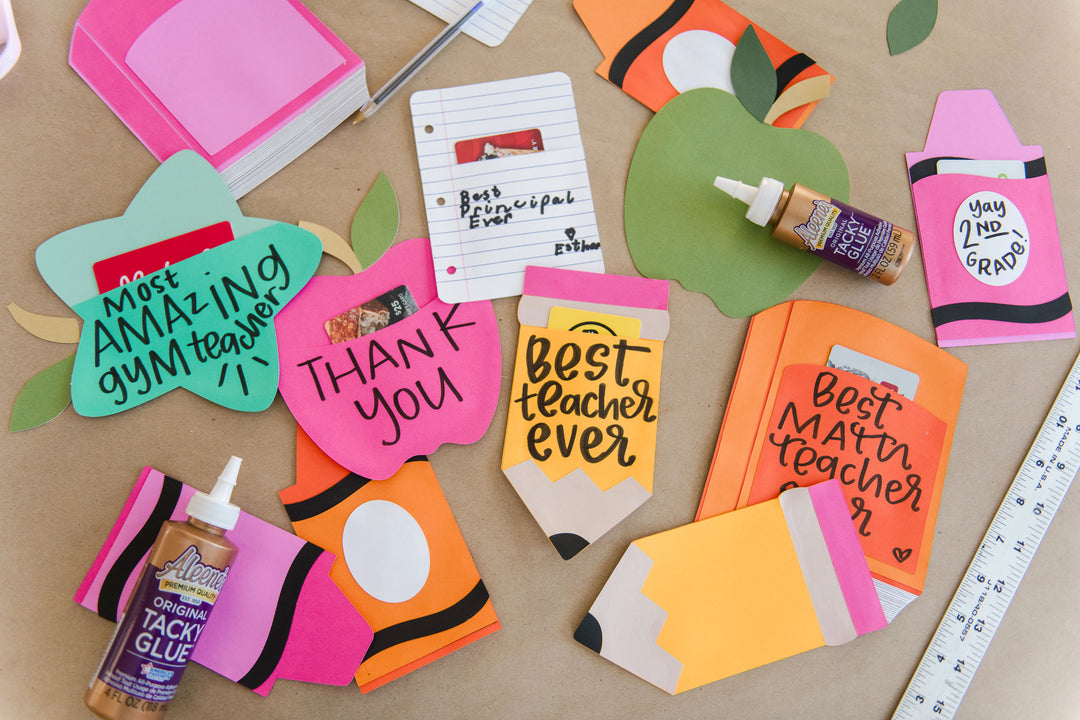
Easy Kids’ Paper Crafts: 3D Paper Bugs with Tacky Glue
Looking for a fun and easy paper craft idea that will leave your kids buzzing with excitement? Try making 3D paper bugs with Tacky Glue! This simple tutorial from Craft Box Girls will show you how to create colorful 3D paper bugs with construction paper, chenille stems, googly eyes, and Aleene’s Original Tacky Glue. This kid-friendly DIY helps develop and refine fine motor skills through cutting and pasting— and it’s a great outlet for creative young minds at play!
Supplies Needed:
- Aleene’s Original Tacky Glue
- Construction paper, assorted colors
- Chenille stems
- Googly eyes
- Scissors
- Pencil
Ladybug Step 1: Cut out shapes
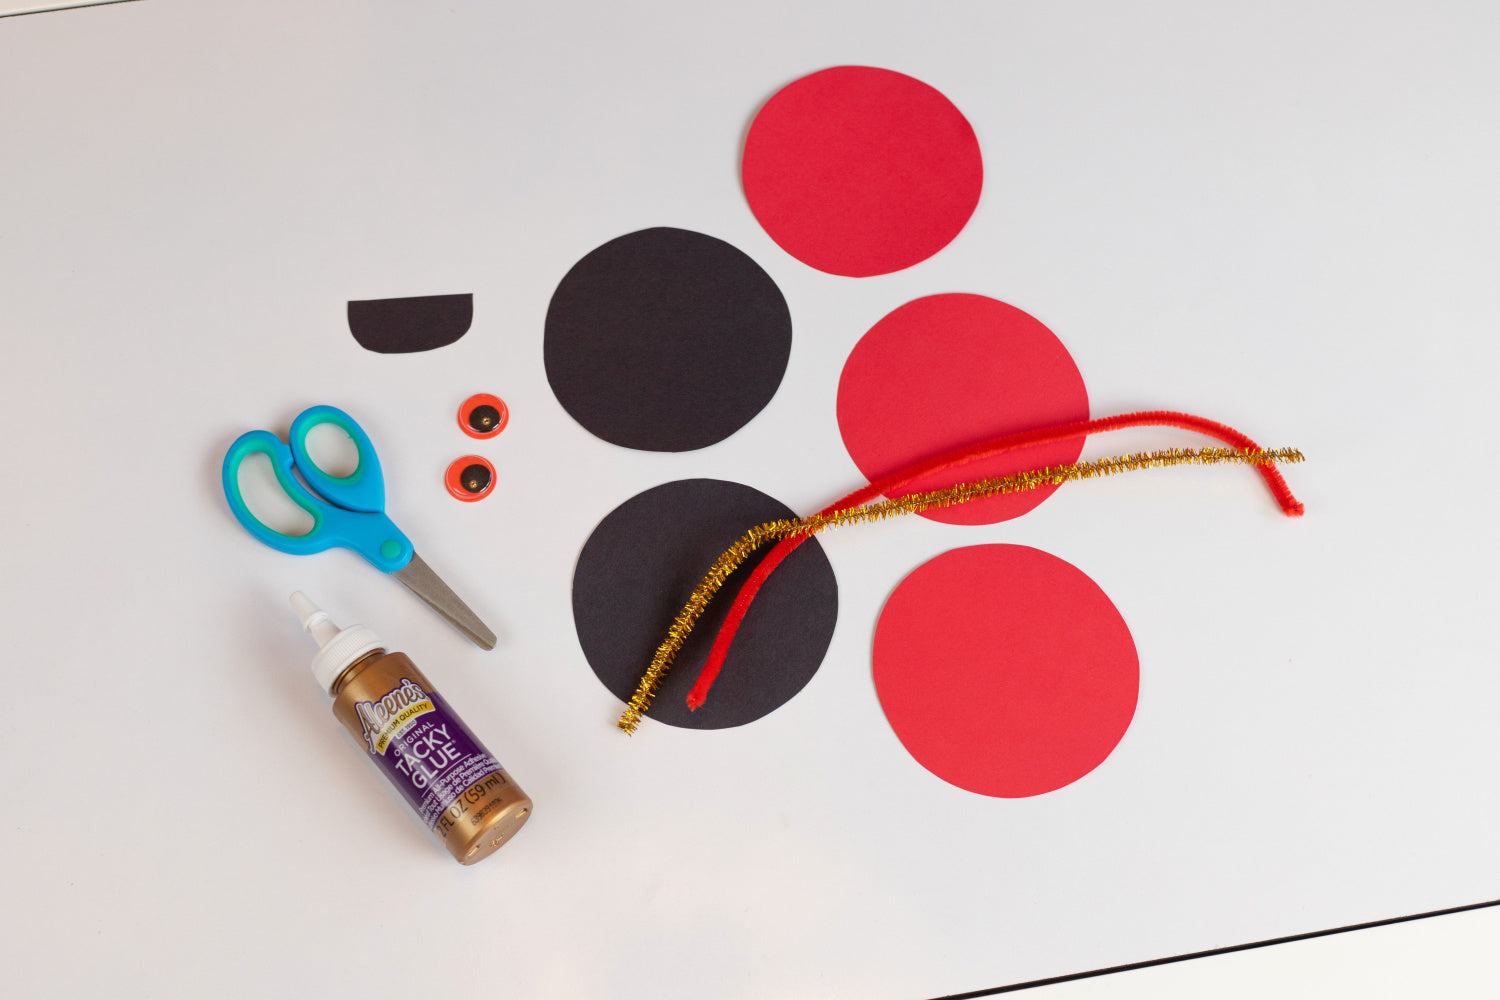
You’ll learn how to make two different paper bugs with this paper craft idea! To make a ladybug, use scissors to cut 3 circles from red construction paper and 2 circles from black construction paper. Cut a small semicircle from black construction paper for the paper bug’s head.
Ladybug Step 2: Fold circles in half

Fold two of each color circle in half. These folded circles will make up the “shell” for your 3D paper bug.
Ladybug Step 3: Create the ladybug shell

Glue the folded circles together, alternating colors. Start by applying Tacky Glue to one side of the folded circle, then press to adhere the next folded circle into place. Repeat this process with the remaining folded circles to create the shell for your 3D paper bug.
Ladybug Step 4: Assemble the paper ladybug
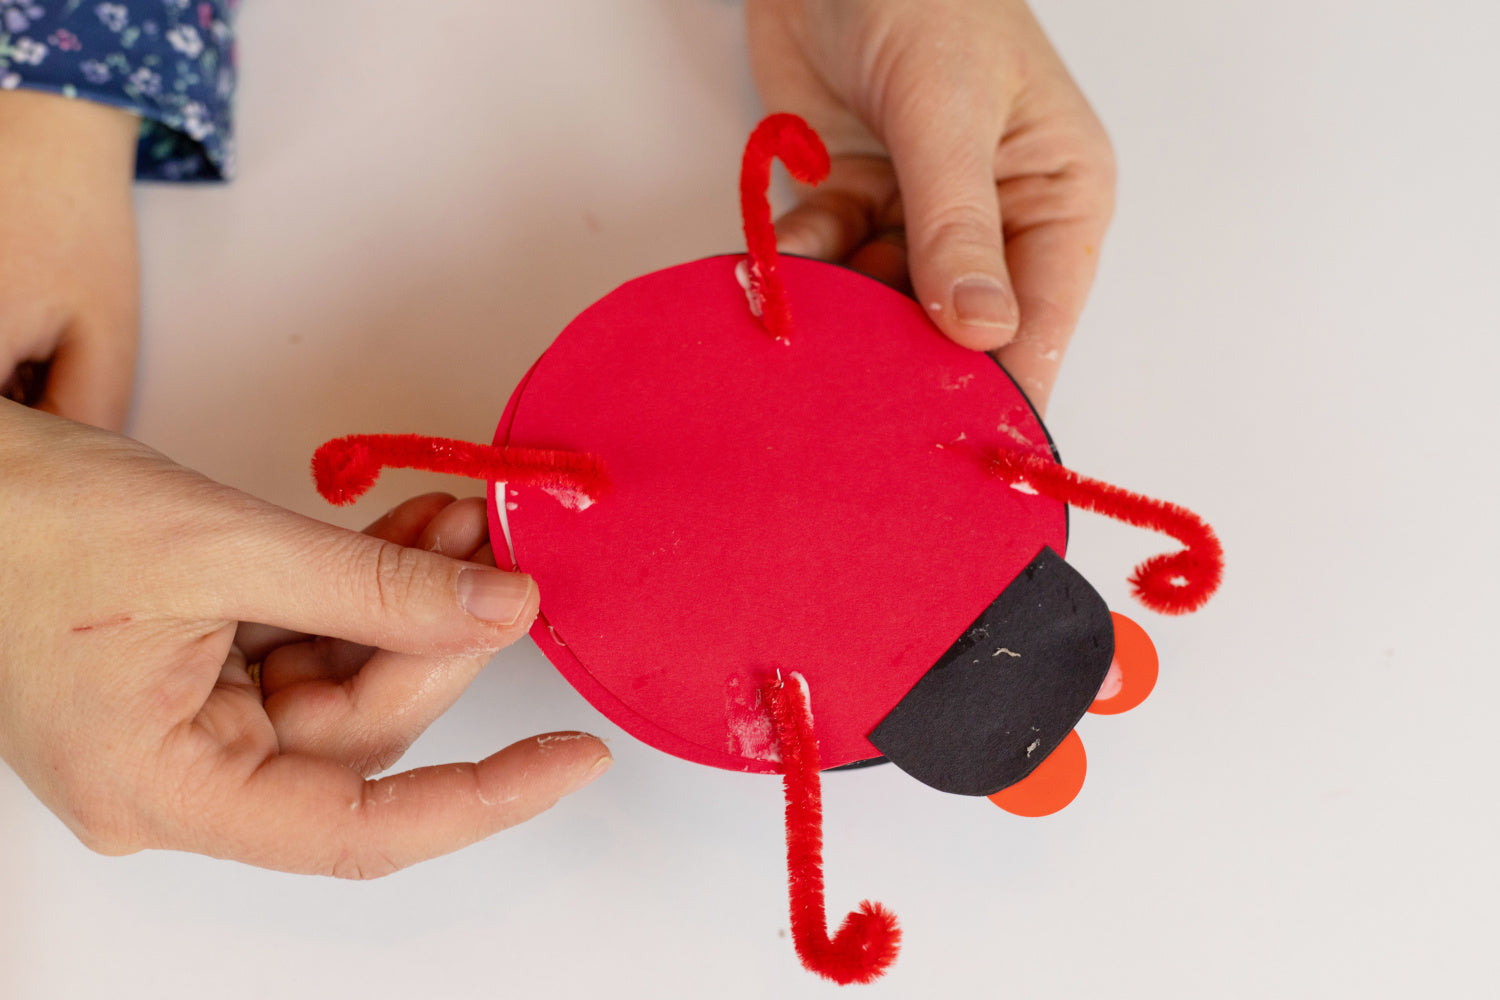
To make a head and body for your paper ladybug, use Tacky Glue to glue the small semicircle to the top of the remaining red circle, then glue on a pair of googly eyes to the head. Glue this piece to your paper bug’s shell. Complete the ladybug’s body by adding chenille stems for feet and antennae. Optionally, you can glue another red circle onto the body for extra security.
Caterpillar Step 1: Cut out shapes for the caterpillar
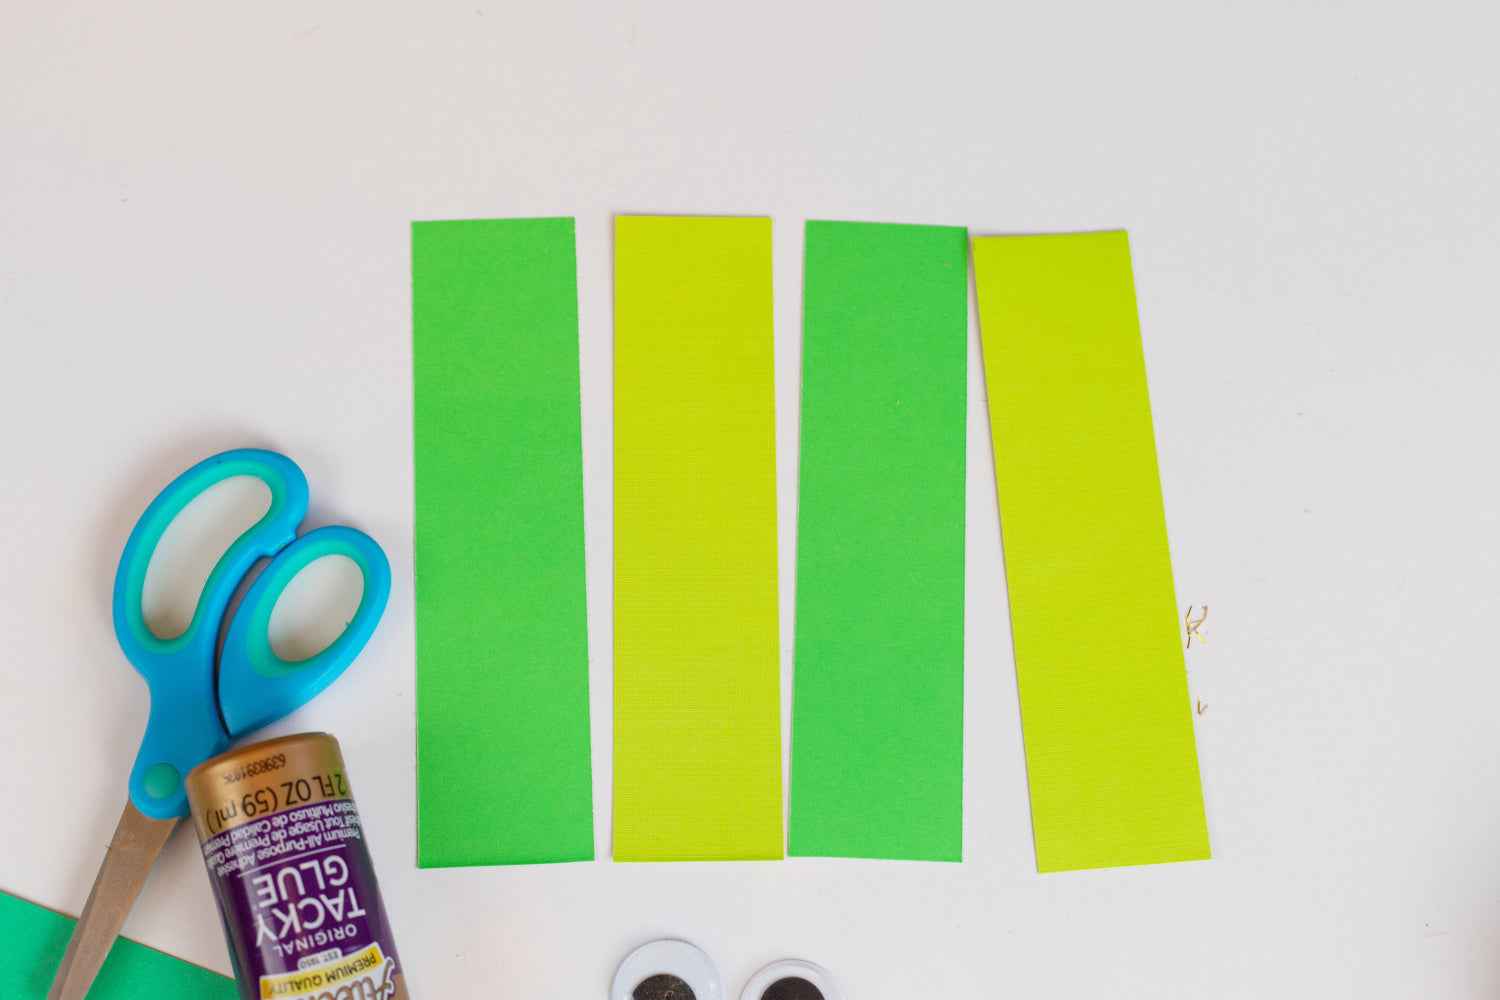
This next paper craft idea will make a colorful caterpillar! To start, cut strips from green and light green construction paper.
Caterpillar Step 2: Glue strips to make loops
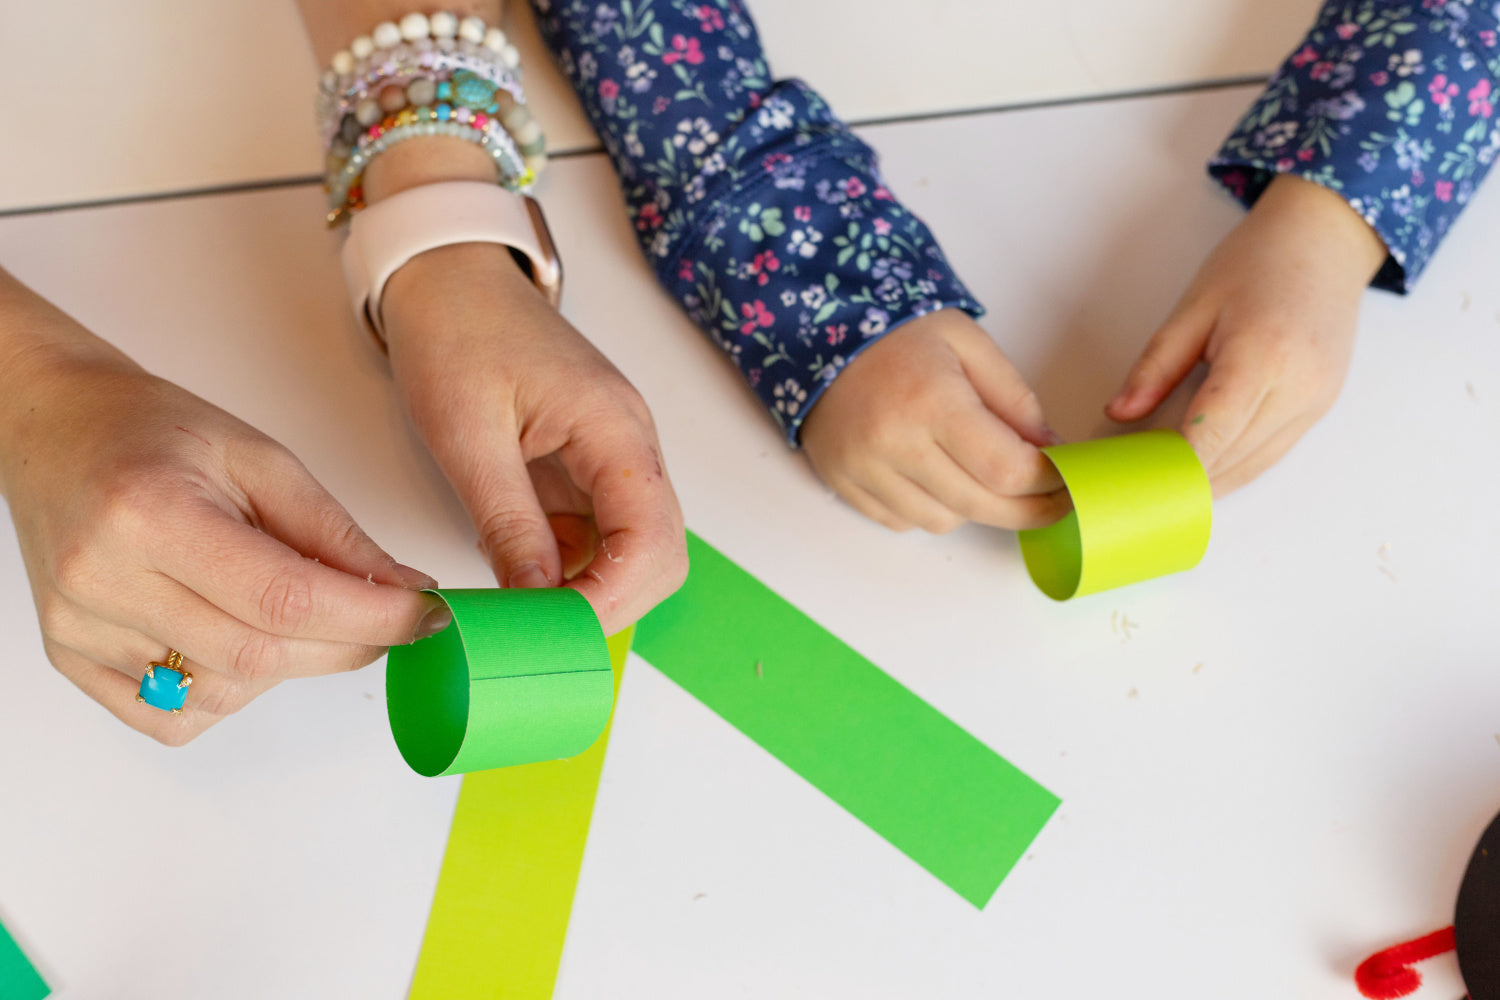
Apply Tacky Glue to the short end of each strip. Bring the other end to the glued area, creating a loop, and press to adhere.
Caterpillar Step 3: Create the caterpillar's body
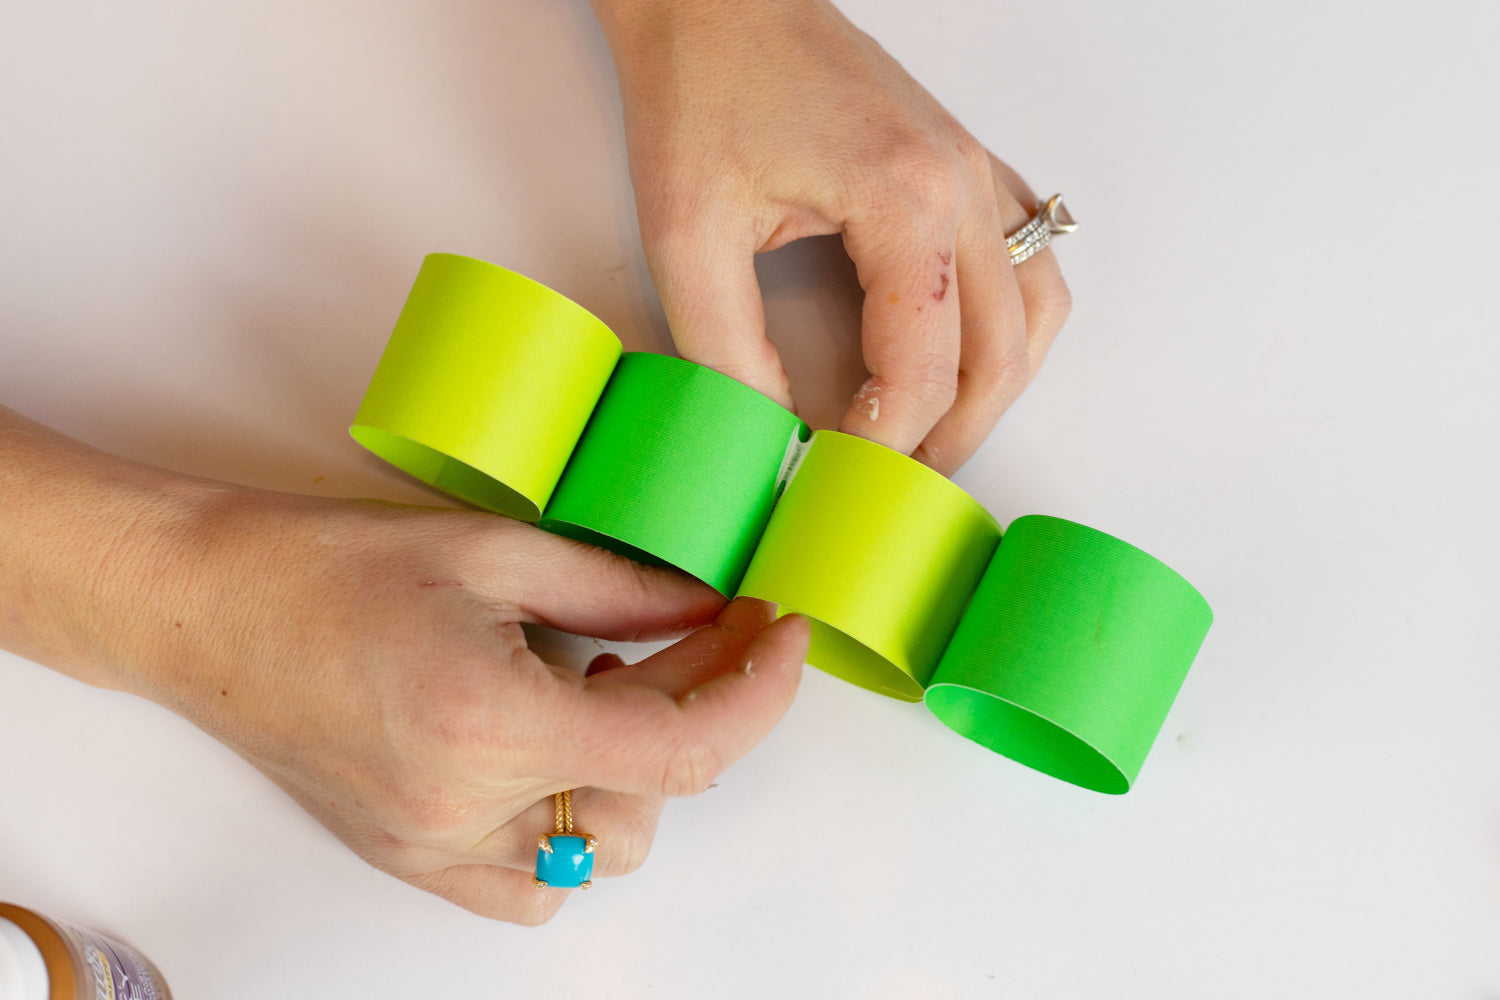
Use Tacky Glue to glue each loop together, creating the body for your paper bug.
Caterpillar Step 4: Make paper antennae
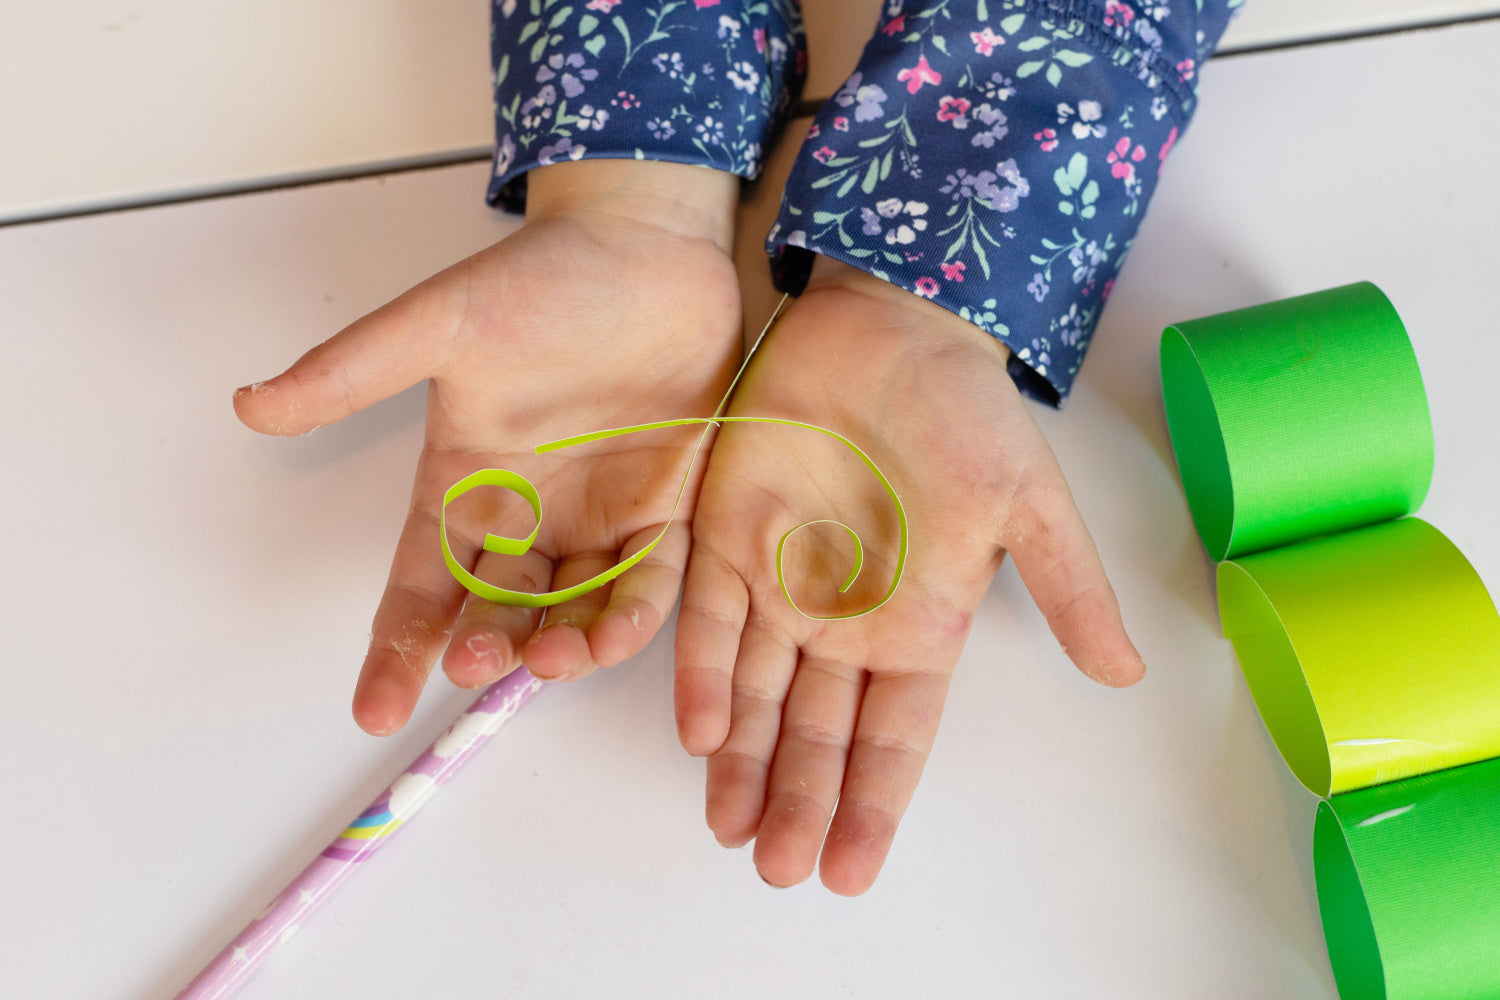
To make antennae for this paper bug, cut thin strips of paper and wrap them around a pencil. Unravel the paper to reveal curly antennae for your caterpillar!
Caterpillar Step 5: Assemble the caterpillar

Bring your paper bug to life by gluing googly eyes and antennae to it’s head. Cut out a leaf shape from green construction paper and glue your caterpillar on top.
Enjoy your paper bugs!

Once the glue has dried completely, enjoy playing with your paper bugs! This easy paper craft idea is a great way to encourage kids’ creativity.
What other paper craft ideas will you try with Aleene’s Original Tacky Glue? Show us your kid-friendly arts & crafts and tag us on social media @AleenesDIY!